How to set up Arduino IDE for ESP8266: Step by Step Guide.
Configure Arduino IDE for ESP8266
 |
| Image by manseok Kim from Pixabay |
ESP8266 community creates an ESP8266 core for Arduino, let ESP8266 take advantage of the Arduino environment. It allows the maker to use existing Arduino libraries and functions run on the ESP8266 without other microcontrollers, which means the maker can code using the Arduino IDE and utilize ESP8266's features.
Before Started:
Latest Arduino IDE must install on your computer. If you haven't installed or on the older one, you can download the Arduino IDE on the official website.
Let's Begin:
I'm using macOS, so all my demonstrations will be in this operating system.
- Open the Arduino IDE.
-
Go to Arduino > Preferences.
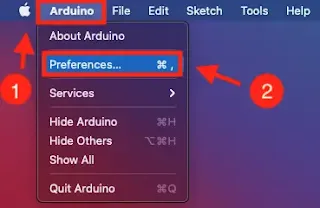
On Arduino IDE, Go to Arduino and click Preferences.
-
Copy this URL
"http://arduino.esp8266.com/stable/package_esp8266com_index.json". - Paste into the Additional Boards Manager URLs column.
-
Click the "OK" button.
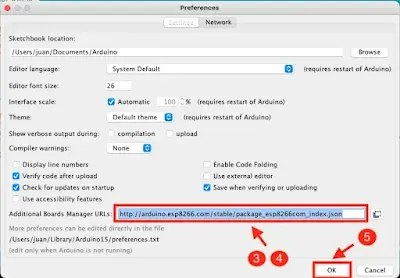
In Preferences, paste the URL to Additional Boards Manager URLs column.
-
Go to Tools > Broad > Boards Manager.
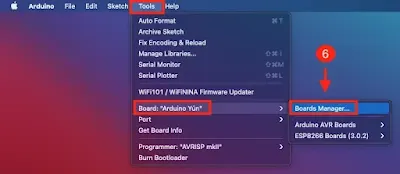
Go to Tools, hover to Board and click Boards Manager.
- Type "esp8266" in the search column.
-
Once the search result return, select the first "esp8266" result and click
the "Install" button.
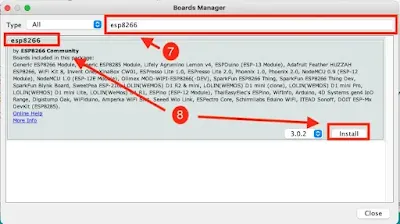
Type "ESP8266" on the search column, select the first result and click install button.
-
The installation should take a few minutes. Go to Tools > Board >
ESP8266 Boards, select "Generic ESP8266 Module".
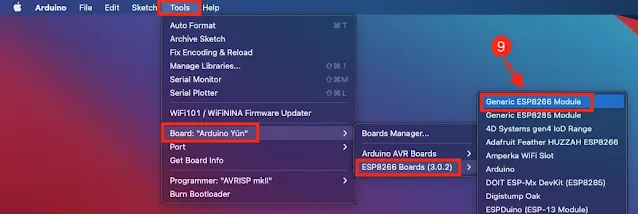
Go to Tools, hover to Board, then hover to ESP8266 Boards, select Generic ESP8266 Module.
- That's all.
After, you can start writing code and upload the code to the ESP8266.
Wire Up and Upload Sketch
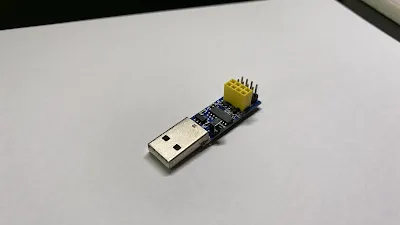
|
| ESP-01 USB Programmer |
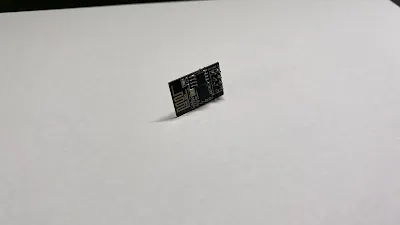
|
| ESP-01S(ESP8266) |
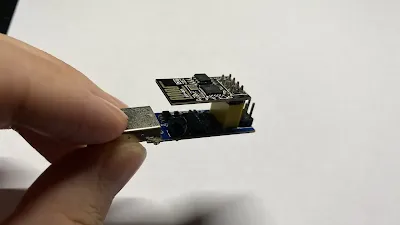 |
| ESP-01S plug-in to ESP-01 USB Programmer. |
For my convenience, I use ESP-01S as an ESP8266 example and ESP-01 USB Programmer as a helper to upload the code to ESP-01S.
P.S. don't forget to download and install CH340 Driver for ESP-01 USB Programmer.
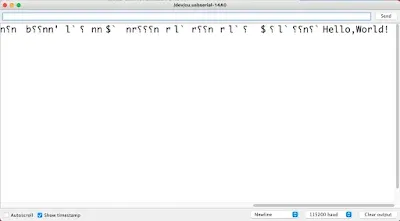
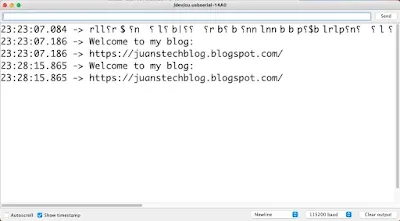
The sample code tries to print a few texts on the serial monitor; the setup function will print "Hello, World!" on the initial, the loop function will keep print my blog website address every 5 minutes.




%20with%20Rechargeable%20NiMH%20batteries%20and%20HT7833%20voltage%20regulator%20cover.webp)

