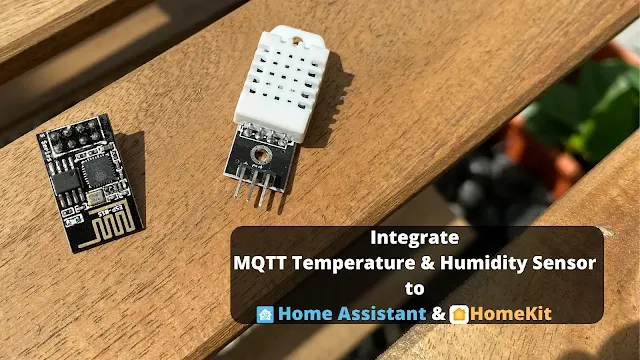
Integrate MQTT Temperature and Humidity Sensor with Arduino to Home Assistant and Apple HomeKit.
My last article made an MQTT Temperature and Humidity Sensor that can communicate with other MQTT clients. This time I will make some modifications to integrate the MQTT sensor into Home Assistant.
Additionally, I will take advantage of the Home Assistant bridge feature to make the MQTT sensor compatible with Apple HomeKit.
First, we modify the previous code to make the MQTT sensor publish data in JSON format, which the Home Assistant can process.
Code:
Install new library.
Get help from the ArduinoJson library to serialize the data JSON format.
Back to Arduino IDE, install it from the Library Manager (Tools -> Manage Libraries.... -> search "ArduinoJSON" and install the ArduinoJson library).
Include the library.
Include the newly installed ArduinoJSON library
  #include <DHT.h>
  #include <ESP8266WiFi.h>
  #include <PubSubClient.h>
  #include <ArduinoJson.h> //include the ArduinoJson here.
Changes MQTT broker info.
We need to change the MQTT broker from a public MQTT broker to a private and local MQTT broker.
I will install the MQTT broker using the Home Assistant Add-Ons feature. The steps will show later.
Change the BROKER constant to the Home Assistant's existing IP address and BROKER_PORT change to 1883.
  const char* BROKER = "< Your Home Assistant IP Address >";
  const int BROKER_PORT = 1883;
Declare a constant for the MQTT topic.
I declare and assign a constant with a string value that specific use as an MQTT topic to publish the temperature and humidity reading in JSON format.
const char* PUB_TOPIC = "< MQTT topic >"; //Your MQTT topic, for my example MQTT topic is "room/juan/dht22"
Create a new function to publish messages.
Create a function called publishJson and accepts two float data type
arguments.
This function will turn the input values into an object, serialize them and publish them to the MQTT broker.
  void publishJson(float temperature, float humidity) {

      DynamicJsonDocument doc(200);

      doc["temperature"] = (String)temperature;
      doc["humidity"] = (String)humidity;

      char data[200];
      serializeJson(doc, data);

      Serial.println(data);
      client.publish(PUB_TOPIC, data);
  }
Call the function in the loop.
Remember to call the function in the time interval If statement block.
I also add another If-Else Statement within the time interval If statement block to check the DHT22 temperature and humidity sensor reading.
If the temperature and humidity readings are not NaN(Not a Number), only
call the publishJson(temperature, humidity) function.
  void loop() {

      if(!client.connected()) {
        reconnect();
      }

      client.loop();

      unsigned long now = millis();

      if(now - lastMsg > intervel) {
        lastMsg = now;

        humidity = dht.readHumidity();
        temperature = dht.readTemperature();

        //Changes start here
        if (isnan(humidity) || isnan(temperature)) { // validation for temperature and humidity reading.
          Serial.println("ERROR: Failed to read from DHT Sensor!");
          client.publish(PUB_STAT_TOPIC, "ERROR: Failed to read from DHT Sensor!");
          return;
        } else {
          snprintf (msg, MSG_BUFFER_SIZE, "Humidity: %.02f and Temperature: %.02f Celsius.", humidity, temperature);
          client.publish(PUB_STAT_TOPIC, msg);
          publishJson(temperature, humidity);
        }
      }
  }
Publish MQTT sensor status (optional).
  const char* PUB_TOPIC = "< Your MQTT Topic >";
  const char* PUB_STAT_TOPIC = "< Your MQTT Topic for status >"; //New topic to track the sensor status.
I have another constant with string value only used in publishing the status message to the MQTT broker, which includes:
- Publish "hello world" when MQTT sensor connected to MQTT broker.
void reconnect() { while(!client.connected()) { ...... if(client.connect(clientId.c_str())) { Serial.println("connected"); client.publish(PUB_STAT_TOPIC, "hello world"); //using the PUB_STAT_TOPIC as MQTT topic to publish message. } else { ...... } } } -
Publish error message when the ESP-01S is unable to read DHT22
measurement.
void loop() { ...... if(now - lastMsg > intervel) { ...... if (isnan(humidity) || isnan(temperature)) { Serial.println("ERROR: Failed to read from DHT Sensor!"); client.publish(PUB_STAT_TOPIC, "ERROR: Failed to read from DHT Sensor!"); return; } else { ...... } } } - Also, publish the reading measurements in the formatted string.
      void loop() {
          ......
  	      if(now - lastMsg > intervel) {
              ......
    	      if (isnan(humidity) || isnan(temperature)) {
                  ......
              } else {
                  snprintf (msg, MSG_BUFFER_SIZE, "Humidity: %.02f and Temperature: %.02f Celsius.", humidity, temperature);
                  client.publish(PUB_STAT_TOPIC, msg);
                  publishJson(temperature, humidity);
    	      }
          }
      }
Full Code:
Verify and Upload the sketch.
After the modification, click the verify button to ensure no syntax error. Then, click the upload button to upload the sketch into ESP-01S.
Last step for the sensor.
Assume everything goes well, unplug the ESP-01S, and put it back with the sensor.
Move on to Home Assistant.
After some code modification, we can start to install the MQTT broker in Home Assistant. In addition, install File editor to allow us to edit the configuration.yaml. We need to place the MQTT temperature and humidity sensor information into the configuration.yaml, so the Home Assistant can process the incoming MQTT message.
Home Assistant installs add-ons.
At Home Assistant, we need to install Mosquitto broker and File editor.Steps to install Mosquitto broker:
- Go to Configuration on the sidebar.
- Click Add-ons, Backups & Supervisor.
- Click ADD-ON STORE (floating button on the right bottom).
- Search "MQTT" and click "Mosquitto broker" in the search results.
- Click install and wait for the installation.
- Toggle the Watchdog option to on and click START.
- Go back to the Configuration again.
- Click Devices & Services.
- You may see in the Integrations tab the MQTT integration highlighted with discovered tag. You can click the CONFIGURE button to link up the MQTT broker.
- If nothing shows on the Integrations tab, you can click the ADD INTEGRATION (floating button on the right bottom) and search "MQTT" to add it.
Steps to Install File Editor.
Edit configuration.yaml.
Click to the File editor in the sidebar -> click the file icon(Browser FileSystem) -> click the configuration.yaml, then place the code below.
Remember to click the save icon after pasting the code. The Home Assistant needs to restart and let the configuration.yaml take effect.
Power up the MQTT sensor.
Power up the MQTT sensor let the measurement publish to the Home Assistant. You may see the temperature and humidity reading shown in the Overview.
The Home Assistant result:
 |
| Temperature & Humidity Sensor display in Home Assistant's Overview. |
Install Apple HomeKit Integration.
To create the bridge between Home Assistant and HomeKit, you follow the steps below:
- Go to Configuration.
- Click Devices and Services.
- In the Integrations tab, click the ADD INTEGRATION (floating button on the right bottom).
- Search and click "HomeKit" (not the HomeKit controller).
- A pop-out window will ask you to check the domains to include. For now, only check the sensor box and click submit button.
- After clicking the submit button, it should prompt a window to ask the user to check the HomeKit Paring instruction in Notification.
- You can go to the Notification and use the Home app to pair.
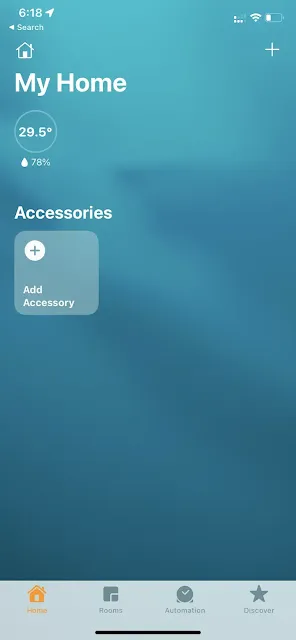
The Home app:
 |
| Home app display the Temperature and Humidity reading. |
 |
| Temperature and Humidity reading in detail on Home app. |


%20with%20Rechargeable%20NiMH%20batteries%20and%20HT7833%20voltage%20regulator%20cover.webp)