Upgrade Old Wall Switch to WiFi Tuya Smart Wall Switch

|
| Smatrul WiFi Smart Wall Switch |
I spent some time last weekend upgrading my old wall switch to the smart wall
switch.
The old wall switch is great, nothing fancy, and serves its purpose. But I
want to build a smart home. So, I expect more from the wall switch.
The smart wall switch I brought was from SMATRUL. It is a 3-gang touch wall
switch, supports WiFi and RF connectivity, integrates into the Tuya platform,
and can install with or without a neutral wire.
Video:
Unbox
The packaging includes:
- 3-gang 1-way smart wall switch
- Capacitor
- Screw x 2
- Instruction manual

|
| A smart wall switch (top left), a capacitor (bottom right), two screws (top right) and instruction manual(bottom right). |
Disclaimer
If you don't know what you're doing, please don't try this at home. You can find an electrician to help you install it. I'm a beginner, but I know what I'm doing. So, I always ensure the power is off before any electric work.
Remove the Old Wall Switch.
The first thing to do here is to turn off the power.
Then, I don't really know how to remove the wall switch. I try to pry up all
the corners around the wall switch. But it looks like I'm in the wrong
direction. So, I google how to remove this wall switch. Later, I find out the
screws are hiding underneath the button. I have to pry up the switch button to
get access.

|
| Pry off the wall switch button to access the screws underneath. |

|
| Removing the screw underneath the wall switch button. |

|
| The wires behind the wall switch. |
After removing the screws and wires from the switch terminal, I checked whether the smart switch could fit in the hole. If you have a fit issue, you can get a spacer to increase the thickness.
Install Smart Wall Switch.
The Smaturl smart wall switch can install with or without a capacitor. In Malaysia, our light switch only has live wires. The neutral wire is rare here.
I planned to install the smart wall switch, so I asked the electrician to add neutral wires to all wall switches during the last renovation. Now, I can install the smart wall switch with the neutral wire. The neutral wire finally paid off after a year.

|
| Red line(Live wire), Blue lines(Light fixture wires) and black line(Neutral wire). |
After removing the old wall switch, we have these four wires:
- Red wire: live wire from the power source.
- Blue wires: live wires from the light fixture.
- Black wire: neutral wire.

|
| Wiring up the smart wall switch accordingly. |
I will connect it according to this:
- Red wire to L terminal
- Blue wires to L1/L2/L3 terminal
- Black wire to N terminal
After I wire up everything, I turn back on the power. Then, it did not work. It works again after I rearrange the blue wires. That's weird.

|
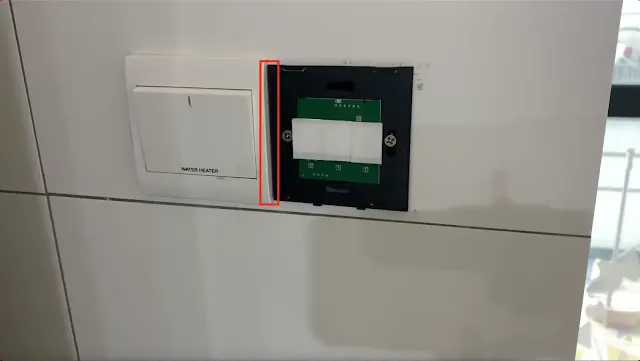
| Not enough space for glass plane to install when tighten screws up and bottom |

|
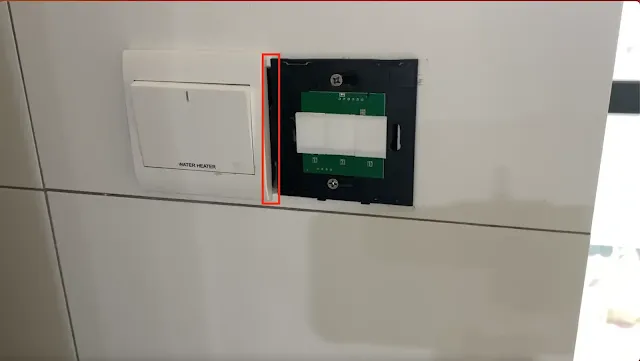
| Leave some gap for glass plane to install when tighten screws left and right |
Next, I need to fix the wall switch on the wall. First, I open the front glass plane. Then, tighten the screws on the left and right. But it left no space for the glass plane to install back. So, I switch the position to top and bottom. It fitted perfectly.
 |
| The smart wall switch has been successfully installed. |
The Problem
The 3-Gang smart wall switch should switch on/off the light accordingly to which button is touched. The problem is the L2 and L3 light fixtures will not function unless the L1 button is on.
I believe this is the serial and parallel wiring issue. Also, the reason for the first power on the wall switch not working. It's beyond my understanding. So, I will leave it to the electrician.
Temporary Fix.
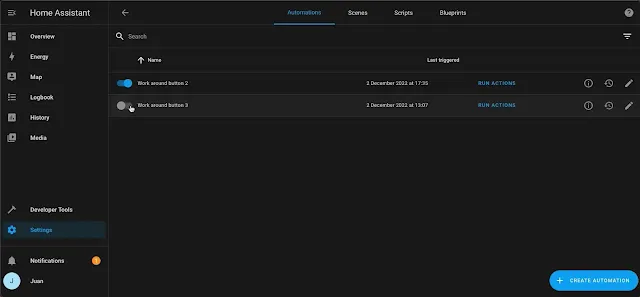
I tried to use the Tuya Smart app to create the automation, but it only allows me to link with other devices, not itself.

|
| Create automation on Home Assistant of temporary fix. |
Therefore, I take advantage of the Tuya integration feature integrated into my Home Assistant. Then, create automation to chain the L2 and L3 to L1, which means L1 will switch on when L2 or L3 switch on.
Final words
I brought this 3-gang one-way Smatrul smart wall switch for RM 28. It's easy to install for my case(thanks to the neutral wire). I have been using it for a few weeks without any issues.
Here I have a takeaway before you leave. Touch and tactile buttons are very different things. If you rarely interact with the smart wall switch, a smart wall switch with touch sensitivity may be a good option. Otherwise, smart wall switches with physical buttons are also good for off-eye use and tactile feedback.


%20with%20Rechargeable%20NiMH%20batteries%20and%20HT7833%20voltage%20regulator%20cover.webp)

