MC-38 Magnetic Contact Switch Sensor: Here is How to Use It with ESP8266 and Arduino.

|
| ESP8266 and MC-38 Magnetic Contact Switch Sensor |
How to use MC-38 magnetic contact switch sensor?
I got this MC-38 contact switch sensor for a long time. But I don't know how to use it.

|
| Reed Switch Module |
My previous project used a reed switch module with positive, negative terminal, and digital pins. I can directly connect the digital pin to any GPIO on my ESP8266 and supply the power through the positive and negative pins.
 |
| 2 wires connector MC-38 Magnetic Contact Switch Sensor |
However, the MC-38 contact switch sensor only has two wires. How to connect it? How can I supply the power?
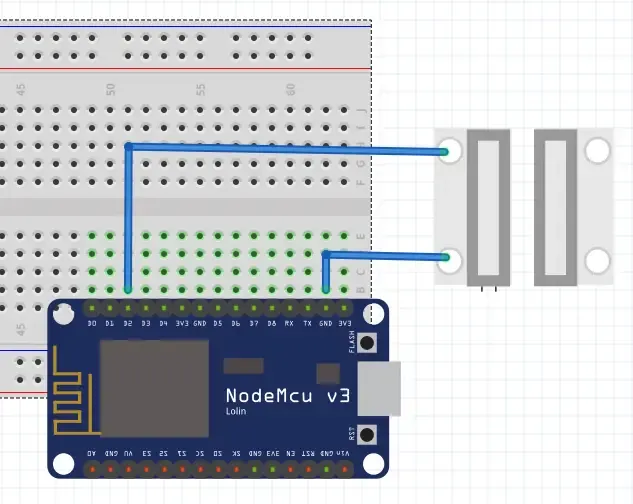
After some research, I found that the sensor can wire up like a button. Take one of the wires to connect to the microcontroller digital pin and the other wire to connect to the ground pin.
Wire up MC-38 with ESP8266
Here is how I wire up the MC-38 with the ESP8266.
 |
| ESP8266 with MC-38 Magnetic Contact Switch Sensor Circuit |
Some articles will add a resistor on the digital or ground pin as a pull-up/down resistor. That part is optional to add the resistor. I tried to use the sensor without any resistor, but the floating signal would interrupt the reading. The ESP8266 already has an internal pull-up resistor in the GPIO 0-15, so we can use it and activate it in the code later.
Coding
Here we can start to write some code to make this works.
In case you need to set up the Arduino development environment for ESP8266, you can refer to the tutorial here.
First, we declare the GPIO pin for the MC-38 switch contact sensor.
int contactSensorPin = 4;
setup()
In the setup() function, we set the GPIO pin for the sensor as an
input pin and activate the internal pull-up resistor.
  void setup() {
    pinMode(contactSensorPin, INPUT_PULLUP);
    ......
  }
Set the Serial connection.
  void setup() {
    .....
    Serial.begin(9600);
  }
loop()
The loop() function will include an If-Else condition to check
sensor status.
  void loop() {
    if (digitalRead(contactSensorPin) == HIGH) {
      Serial.println("Your door is Open");
    } else {
      Serial.println("Your Door is Closed");
    }
    delay(100);
  }
The loop function will include an If-Else condition to check sensor status. Print "Your door is open" to the serial port when the ESP8266 reading is high from the sensor. Otherwise, it will print "Your Door is closed" to the serial port.
Now, we can upload the code to ESP8266 and open the serial monitor to observe the output.
Full Code:
Demonstration
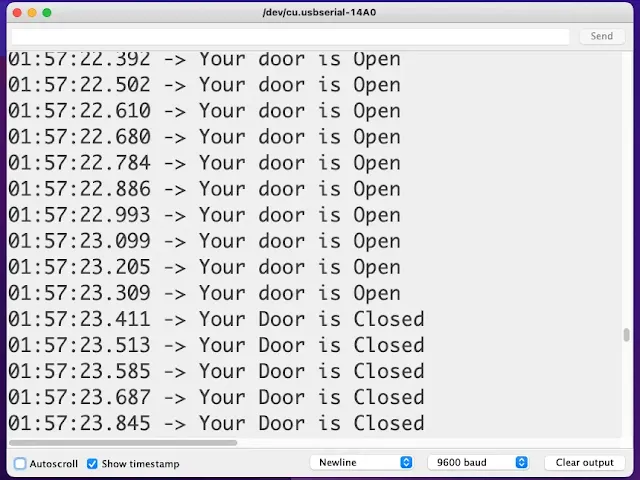
In the serial monitor, we can observe the texts change when the magnetic near contact switch sensor.
 |
| Serial Monitor display the MC-38 Magnetic Contact Switch Sensor Status |


%20with%20Rechargeable%20NiMH%20batteries%20and%20HT7833%20voltage%20regulator%20cover.webp)

